1. In Curves open the dialogue panel, and click the Channel button which should have RGB on it. It will open alternatives of Red, Green and Blue. Click your choice and the dialogue square and diagonal line will change to that colour. Dragging the line upwards will increase the intensity of that colour. All other facets of the dialogue box will perform as it does for RGB.
2. Levels will operate in the same way, but by sliding the arrows to left or right, the middle and right arrows will have more effect than the left one.
3. Image/Adjustments/Hue and Saturate will do the same. Click on the button identified as Master to give you a choice of alternative colours. Click on your choice, then move the Saturate slider to the right to enhance that colour. It will work only on colours already on the photograph. So a photo of a predominantly red nebula will respond little if green is selected.
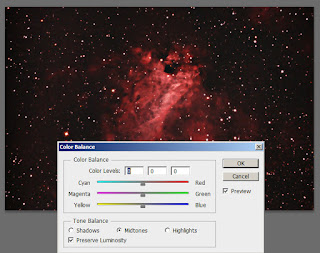
4. Image/Adjustments/Colour Balance will take you to the Colour Balance dialogue where you choose Shadows, Midtones or Highlights, then move the colour sliders to the right to enhance.
Shadows refers to the dark background, Highlights will work on stars and very bright areas. Midtones handles everything.

5. Go to Image/Adjustments/Selective Colour and a dialogue panel will screen where you can choose from the range of colours in the button showing Red. In this panel the Primary and Secondary colours are available and they are varied by the Secondary colour sliders on the face of the panel. This panel varies the colours in the photograph by those chosen on the face of the panel. So if there isn't much green in the photo this method will not be of much value. However if there is red as in the example, choosing red at the start will allow you to modify it widely. In the second photo, red has been chosen and modified by sliding the Cyan arrow to the left. The third photo shows the effect of Cyan and Yellow arrows moved to the left.
 |
| Original |
 |
| Enhanced by Cyan |
 |
| Enhanced by Cyan and Yellow, not very astronomical |


